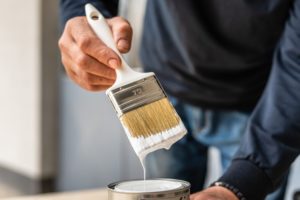
Remember these tips from Columbia Paint Co. before applying primer!
Painting a room or any surface in your home starts with a crucial step: applying primer. While it may seem like an extra task, primer is essential for achieving a smooth, long-lasting finish. Columbia Paint Company is here to help you navigate selecting and using primer for your painting project.
How Much Primer Do You Need?
The amount of primer you need depends on the surface you’re painting and its condition. Different surfaces and finishes require different primer applications to ensure the best coverage and durability.
- One Coat: New drywall, raw wood, and subtle color changes usually only need one coat of primer. The primer helps seal the surface and create a smooth base for the paint to adhere to.
- Two Coats: For damaged drywall, stained walls, or rusty metal, you’ll need at least two coats of primer to cover imperfections and block any stains from bleeding through the top coat.
- Three Coats or More: Bold color changes, such as covering dark walls with a lighter color or painting over wood paneling, will require multiple coats of primer. This helps prevent the original color or texture from showing through the final paint layer.
One gallon of primer typically covers about 200-300 square feet, but this can vary depending on the surface. Make sure to buy a little extra, especially if you need multiple coats.
Do You Really Need Primer?
Primer isn’t always necessary, but it’s often recommended for the best results. Whether or not you need primer depends on the condition of the surface and the paint you’re using.
- When You Need Primer: Primer is essential if you’re working with new drywall, raw wood, or a surface with stains or damage. It seals porous surfaces, blocks stains, and provides a smooth, even base for the paint. It’s also necessary when making a bold color change.
- When You Might Not Need Primer: If you’re repainting a well-maintained wall with a similar color, some high-quality paints come with built-in primers. In this case, you might be able to skip the separate priming step, but for the most durable results, primer is still recommended.
If you’re unsure, it’s better to use primer. Skipping this step can result in uneven coverage or the need for more paint coats, which can be time-consuming and costly.
The Primer You Should Use
Different types of primer are available, and selecting the right one for your project ensures a smooth and durable finish.
- Water-Based Primer (Latex): This primer is ideal for drywall, bare wood, and previously painted surfaces. It dries quickly and is easier to clean up with soap and water. Latex primer is a great option for interior projects.
- Oil-Based Primer: This is more durable and works well on tough surfaces like stained wood, metal, or areas with heavy stains. Oil-based primer also provides better adhesion for oil-based paints and is typically used for exterior projects.
- Stain-Blocking Primer: If your walls have water damage, smoke stains, or other marks, stain-blocking primer is essential. This type of primer seals in the stains to prevent them from showing through the top coat.
- Shellac-Based Primer: This is the go-to option for sealing tough stains and odors. It’s often used on furniture, trim, or walls with heavy smoke or water damage.
Match the primer type to the paint you’re using—latex with latex, oil with oil—for the best adhesion and durability.
Getting Started
Once you’ve chosen the suitable primer and determined how much you need, it’s time to get started. Follow these steps when applying primer for smooth results:
- Prepare the Surface: Make sure the surface is clean, dry, and free from dust or debris. For stained or damaged surfaces, lightly sand to smooth imperfections before applying the primer.
- Apply Even Coats: Using a roller or brush, apply the primer in thin, even coats. Make sure each coat is fully dry before applying the next, especially if multiple coats are needed.
- Allow Drying Time: Depending on the primer, it will take several hours to dry thoroughly. Follow the manufacturer’s instructions on drying times to ensure the primer sets properly.
- Check for Coverage: After the primer has dried, inspect the surface for any missed spots or uneven areas. If necessary, apply an additional coat to ensure full coverage.
Don’t rush through the priming process. Giving the primer time to fully dry and settle ensures a better result once you start painting.
At Columbia Paint, we carry a wide selection of primers to suit any project. Visit us today for expert advice and all the necessary supplies to get started!
NEW LOCATIONS! VISIT THE US AND EXPLORE!
We’ve moved from the Dobbin Road location to our new, roomy location just down the road:
Columbia Paint and Decorating, a Benjamin Moore Dealer
6822 Oak Hall Lane, Suite C2, Columbia, MD 21045
443-319-4001
Expect the same one-stop shopping for all your decorating needs. We are a full-service Benjamin Moore dealer offering the best quality decorating products at the best prices. We have an ample supply of paint and paint supplies, wallcoverings, custom window treatments, fabrics, and now NEW flooring selections from Kaleen Rugs and Luxury Vinyl Tile samples.
And, of course, the same excellent customer service, knowledge, and customer satisfaction that you’ve come to expect.
ANNOUNCING OUR SECOND LOCATION:
Clarksville Paint & Decorating, a Benjamin Moore Dealer
12447 Clarksville Pike, Suite 1A, Clarksville, MD


